How to set up your Terminal
Downloading Terminal API
If Terminal API application is visible in the launcher, skip this section.
For S1U2: You need to tap on the Software "MENU" button that appears after a reboot until the TID + password are displayed
Access the launcher on your payment terminal by pressing the circle at the bottom of the screen. If the circle isn't visible, swipe up from the bottom of the screen to reveal the navigation menu.
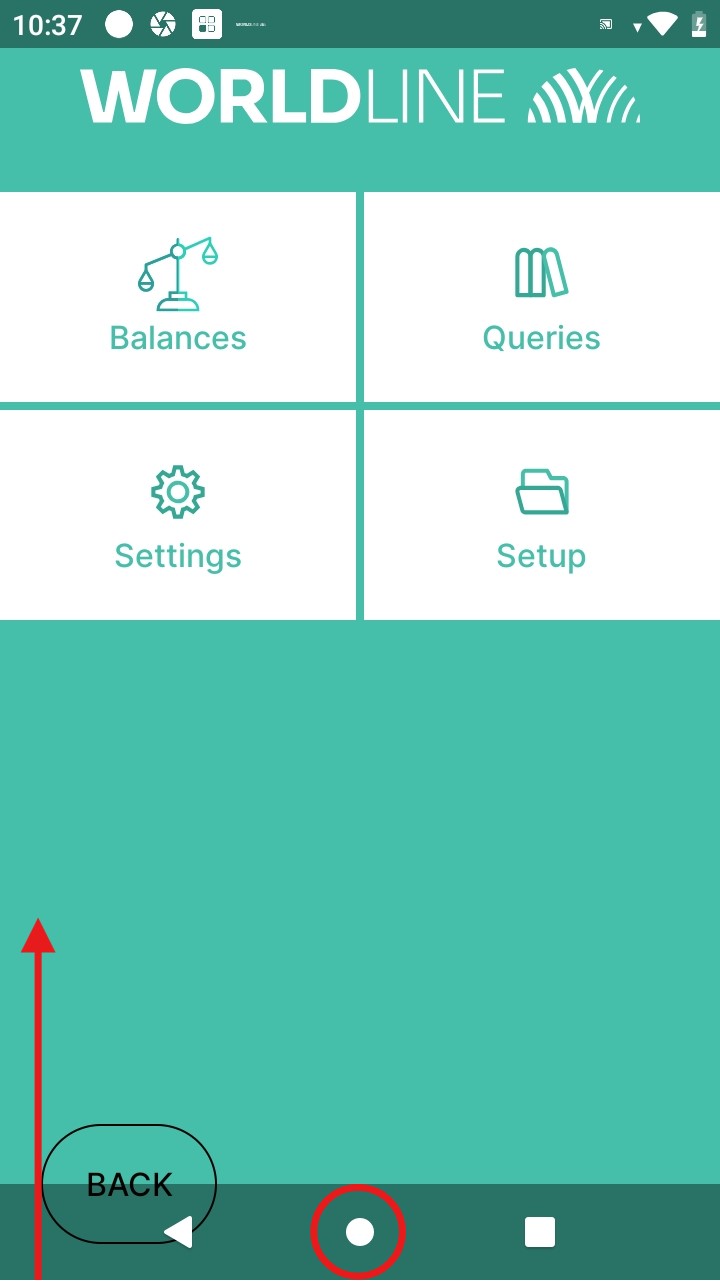
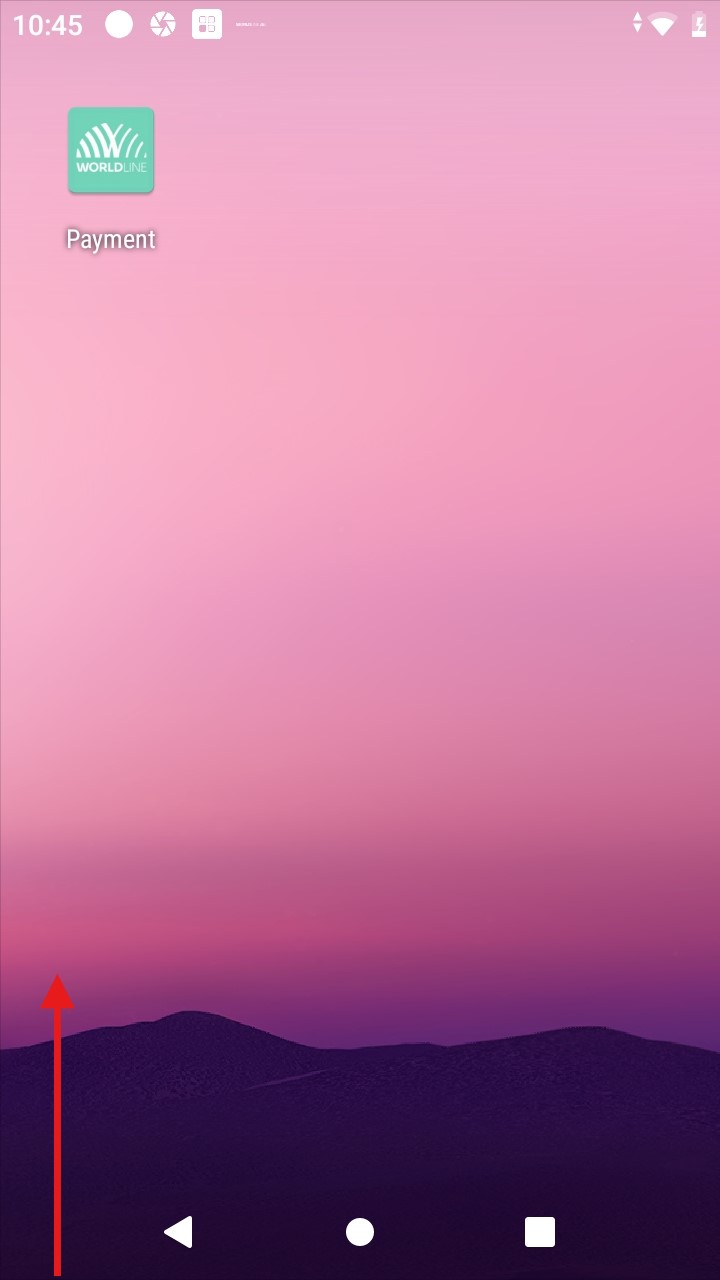
Swipe up from the bottom of the screen to access the App Drawer. You will see a list of all installed applications.
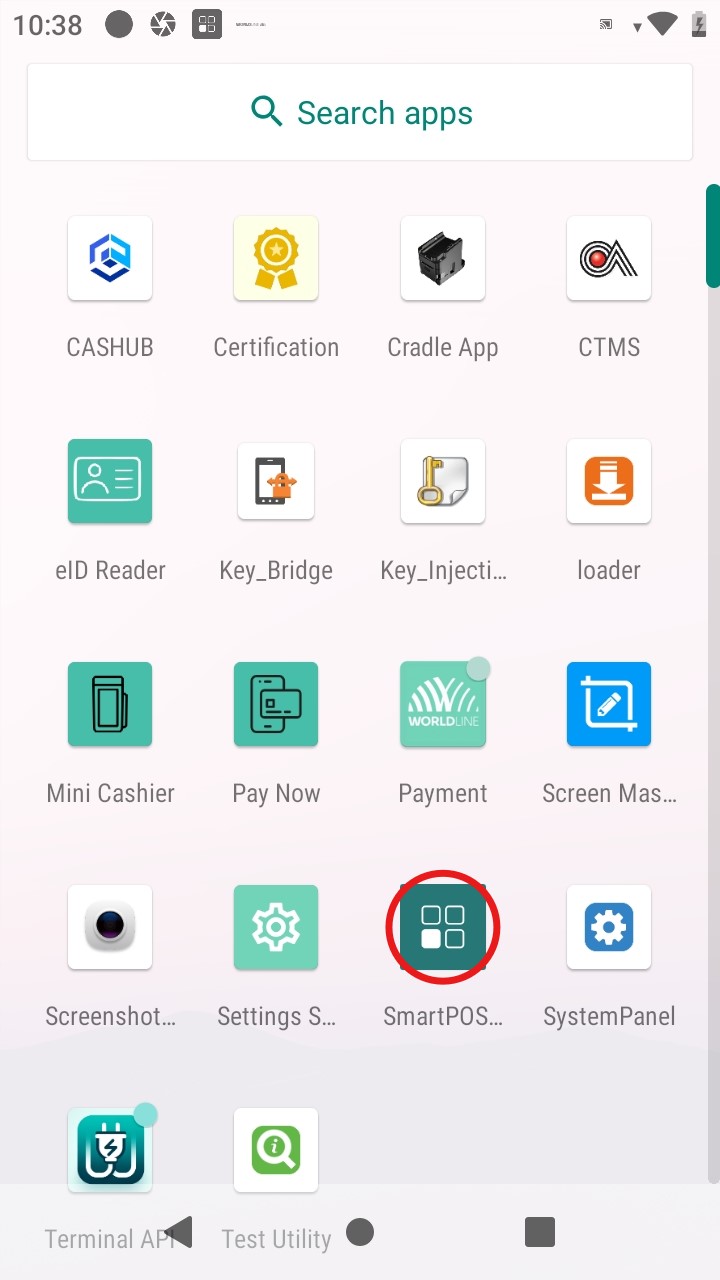
Tap on the "SmartPOS Store" app. The icon may have changed, but the app name remains the same.
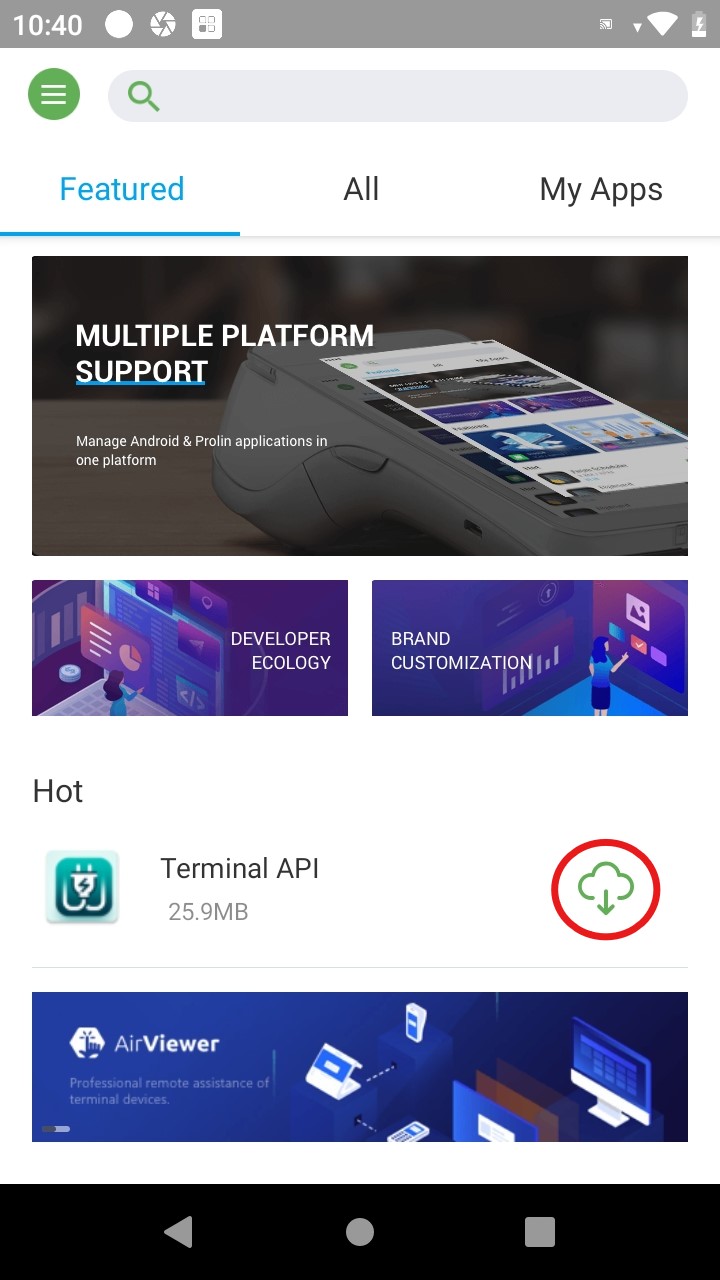
In the “All” tab of the store, click on Terminal API cloud icon for it to be downloaded into the terminal.
Terminal API initial configuration
To ensure proper functionality of our Terminal API on your payment terminal, please follow these configuration steps:
Access the launcher on your payment terminal by pressing the circle at the bottom of the screen. If the circle isn't visible, swipe up from the bottom of the screen to reveal the navigation menu.
Swipe up from the bottom of the screen to access the App Drawer. You will see a list of all installed applications.
Tap on the "Terminal API" app. The icon may have changed, but the app name remains the same.
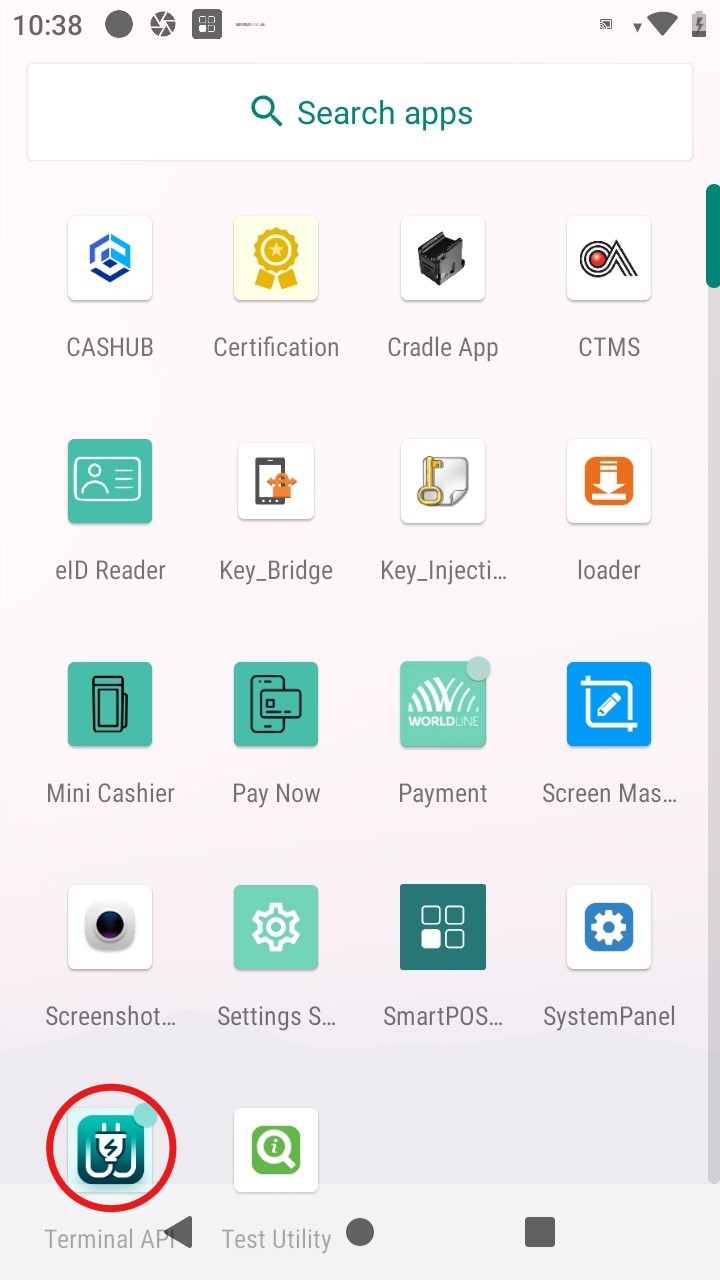
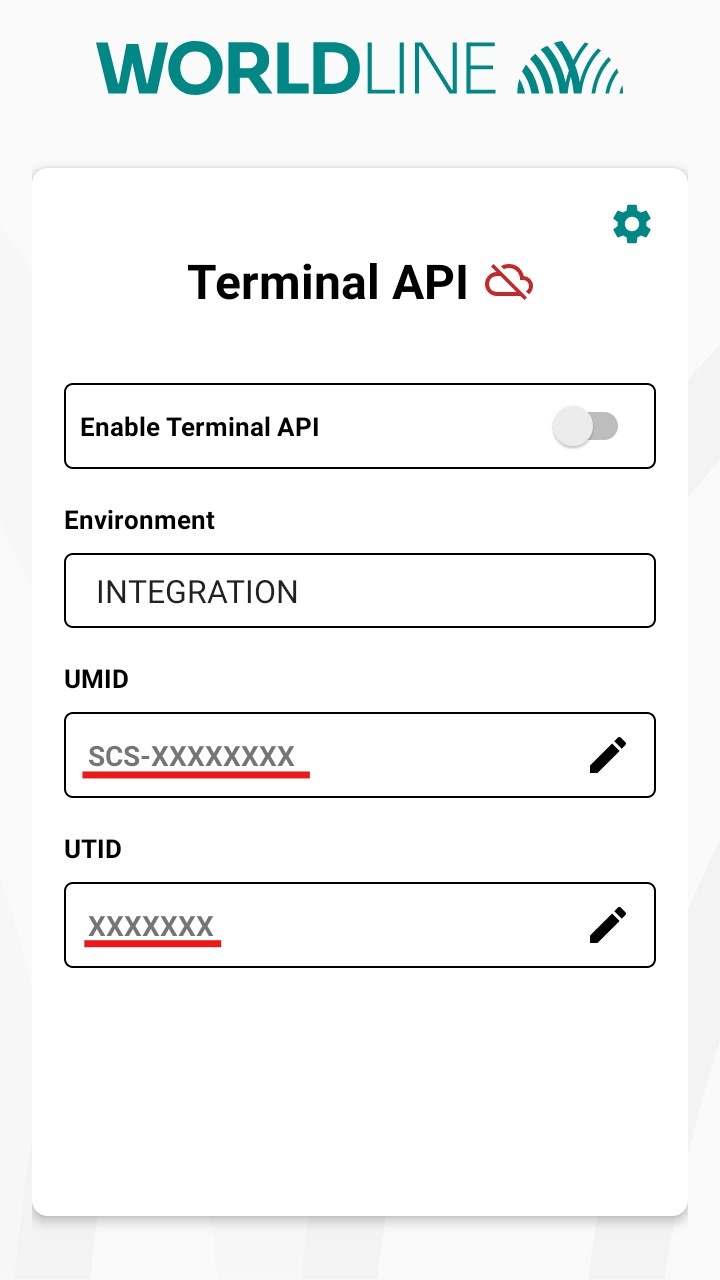
Enter the data provided to you (UMID and UTID). Double-check this information, as any errors will prevent server communication.
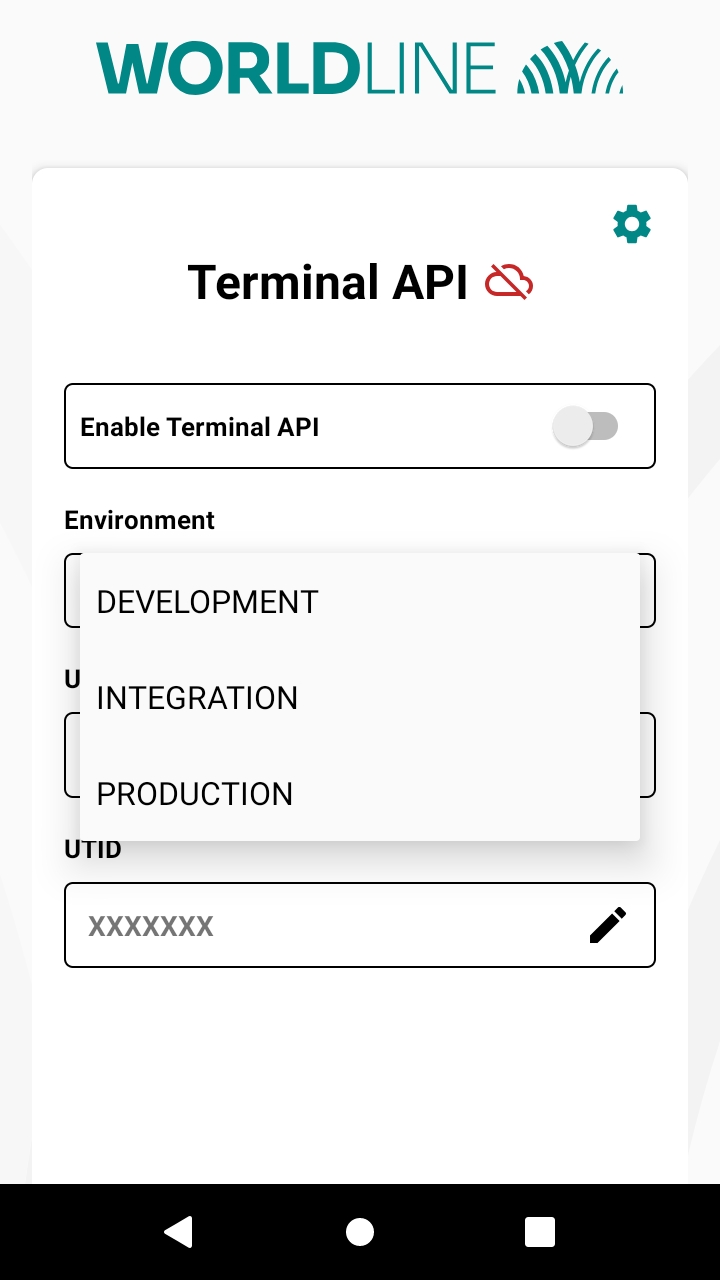
Select the appropriate environment to connect to. Use "PRODUCTION" for live operations or "INTEGRATION" for testing with test terminals and cards.
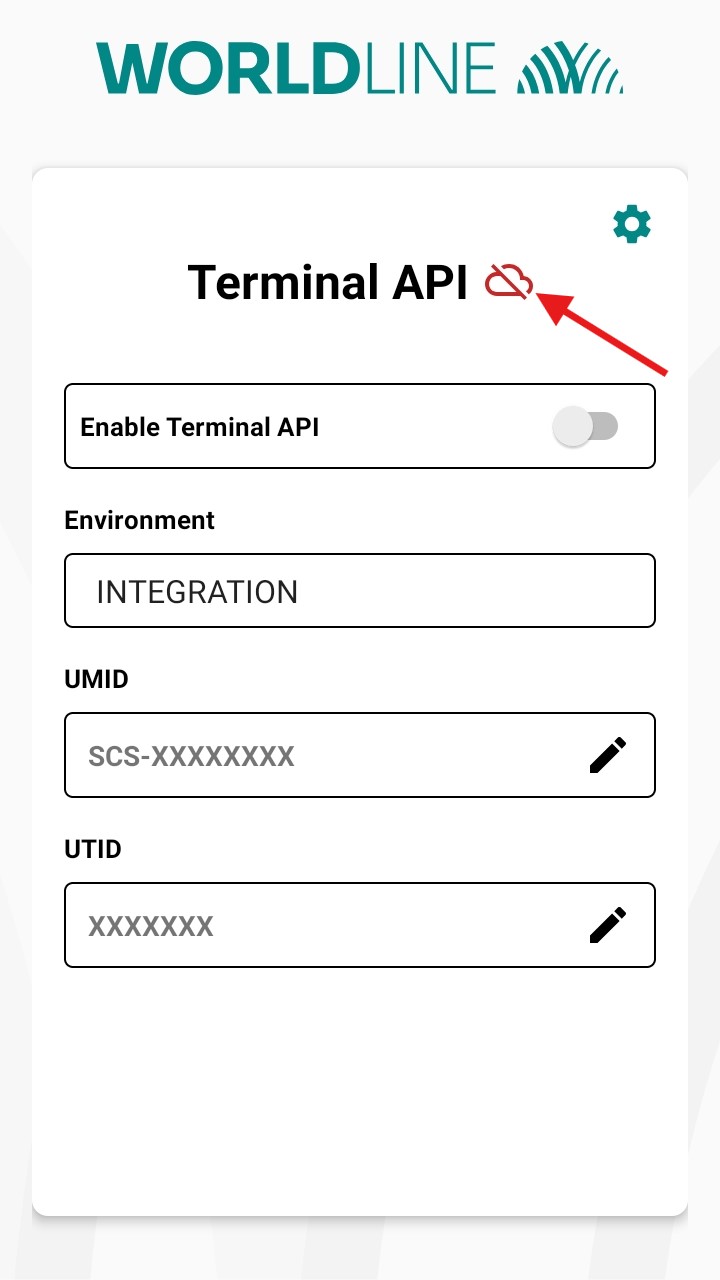
Activate the Terminal API by tapping the slider next to it. Ensure the cloud icon next to Terminal API turns green.
Next steps
You are done! Now you can communicate Cloud to Cloud with your cash register thanks to Terminal API.
Initialisation and configuration
The initialisation and and configuration are run periodically, but if you want to ensure that you have the latest settings if something is pending, please follow these steps.
Access the launcher on your payment terminal by pressing the circle at the bottom of the screen. If the circle isn't visible, swipe up from the bottom of the screen to reveal the navigation menu.
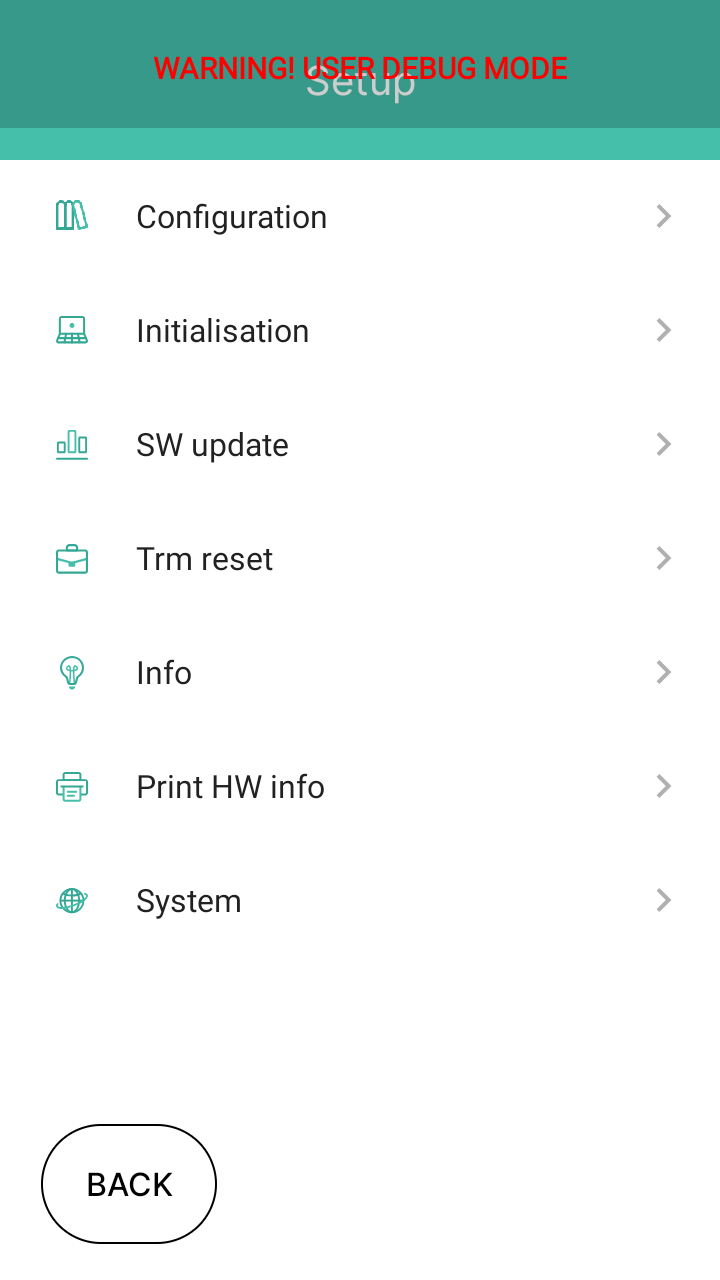
Click on the Setup menu
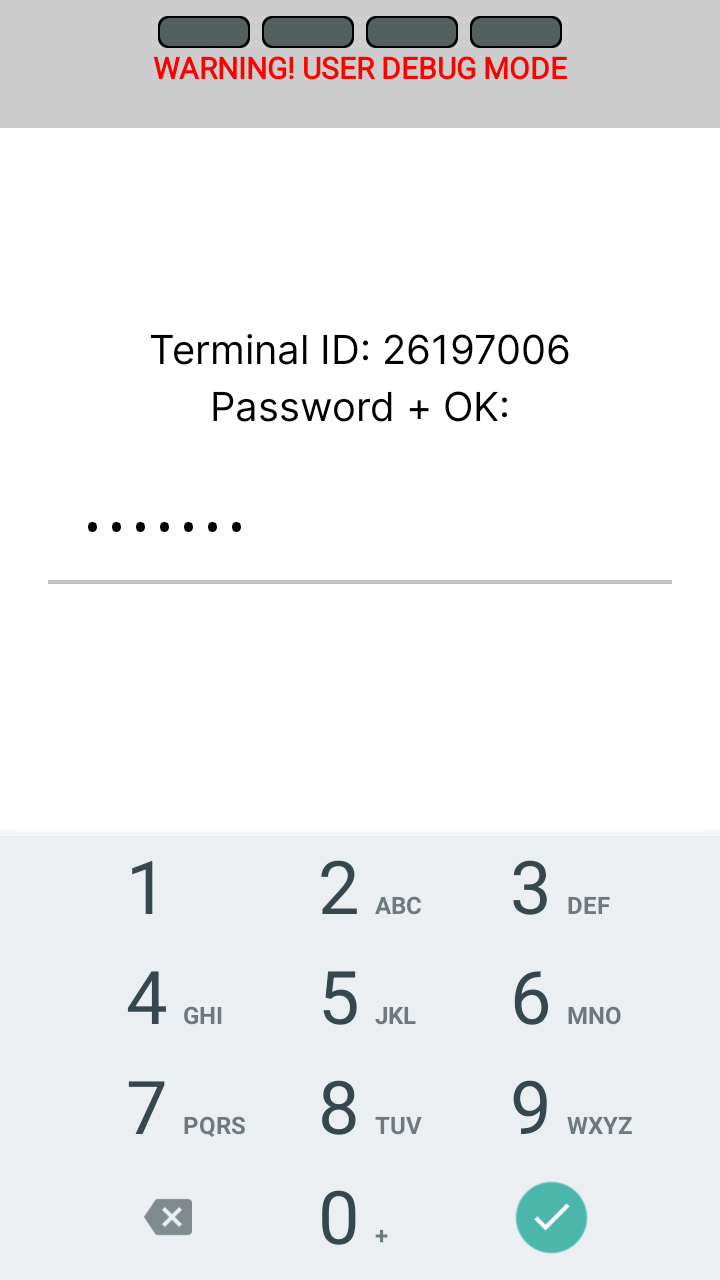
Enter the password.
Click on "Configuration" and afterwards on "Initialisation".